
Inventory
Generating Item Labels with UPC Codes
| Title: | Generating Item Labels with UPC Codes |
| Submitted by: | Software Support |
| Issue: | How do I generate labels for my store products that have UPC coding? |
Creating labels with scannable UPC codes for your inventory items can be accomplished by running an inventory merge. To access the Inventory Item Labels merge follow these steps:
![]()
![]()
![]()
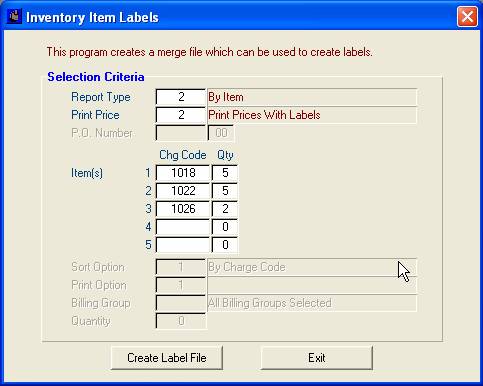
Labels can be run by purchase order number, by item, or catalog labels. This example shows criteria entered by item and allows you to select specific charge codes and quantities. Choosing the report type "Catalog Labels" would allow you to enter a sort option, print option, billing group and quantity.
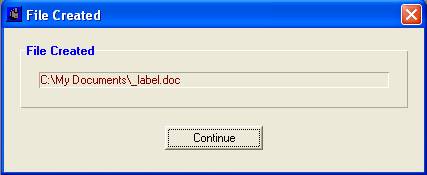
Once you have entered your chosen criteria, click the Create Label File button. Magic will create a merge data file and place it in your designated word processing directory. A window will open that tells you the directory path and location of the data file.
Next, open your label template in Microsoft Word and merge the data file. If you are unfamiliar with how to perform a merge you can access this information by clicking on Help, Documentation, Getting Started Manual and reading the Introduction to Rapattoni Magic Merge.
Please note that the label template provided by Rapattoni is compatible with standard Avery 5160 labels. If your labels do not have the bar code on them it is likely that your computer does not have the proper fonts installed. We have an excellent Magic Resource Center Article that instructs you on installing bar code fonts.
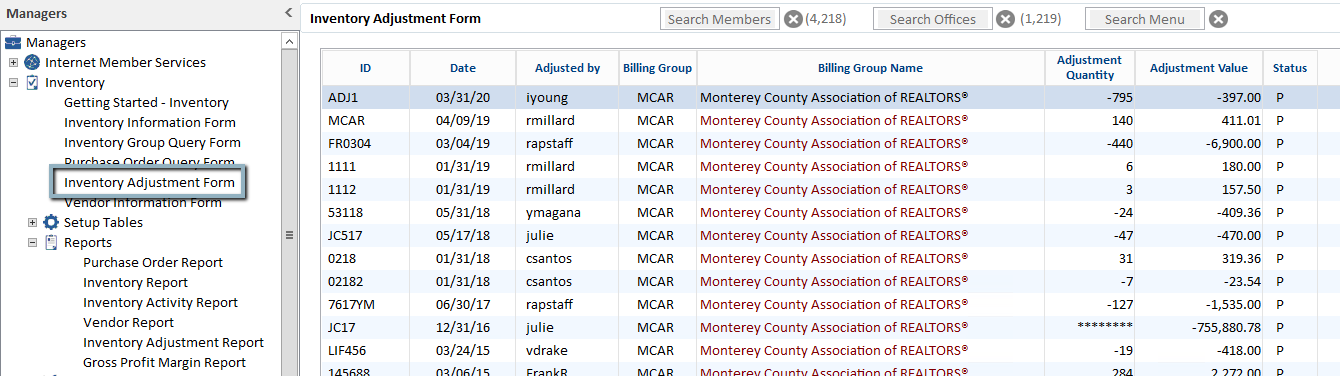
Inventory Adjustments
You can make adjustments in your Cloud AMS Inventory module when necessary to keep your inventory records accurate. After performing a physical inventory count, run an Inventory Report to compare your manual count against the inventory values in the system.
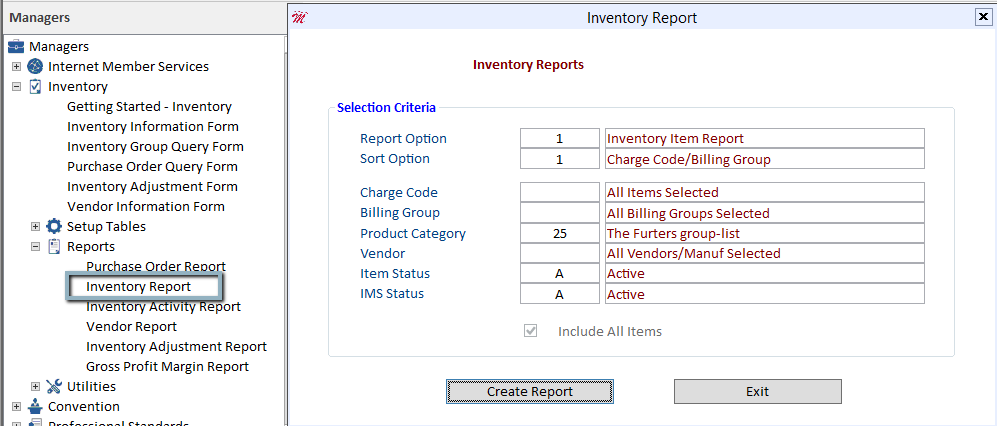
NOTE: A few examples in this article are based on the following report results:
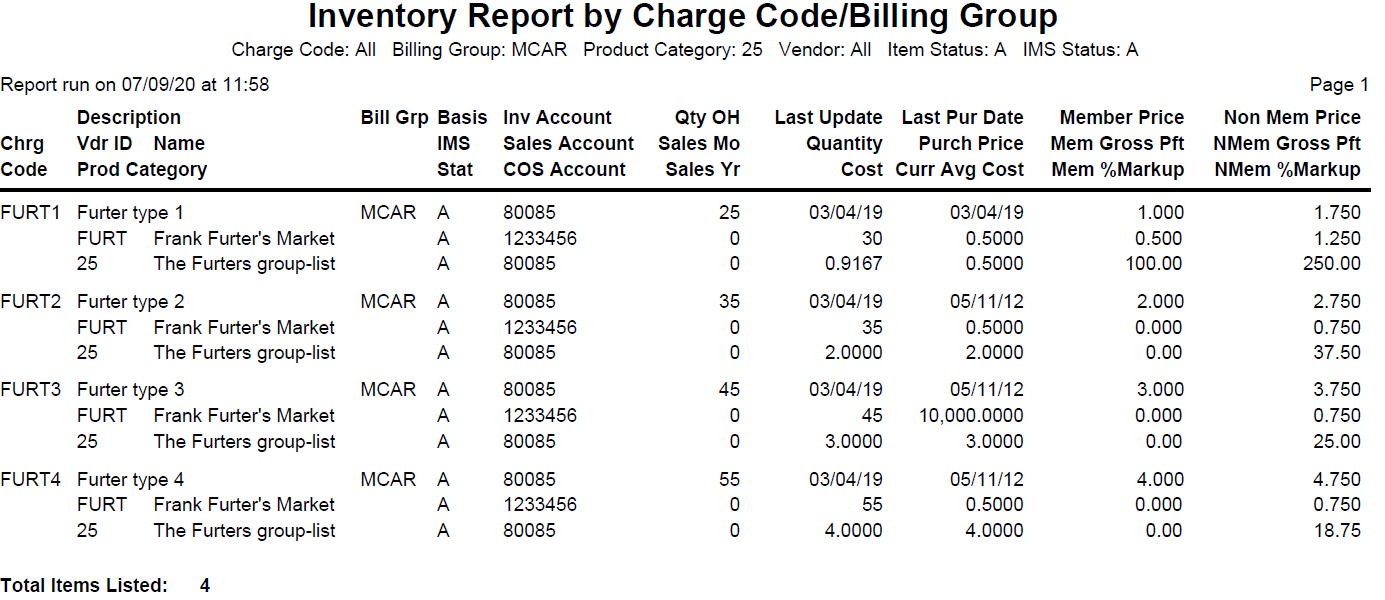
If the manual count of your inventory reveals a quantity that does not match the Inventory Report, you need to create an adjustment.
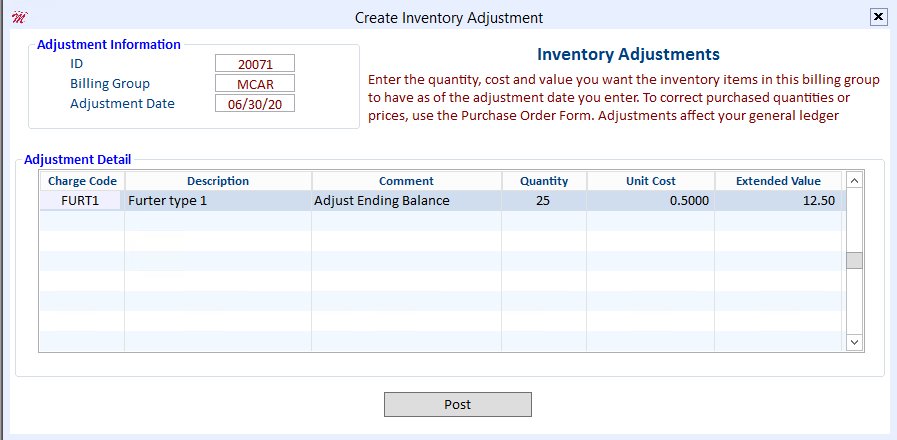
From the Inventory Adjustment Form, press Ctrl+E to open the Create Inventory Adjustment form.
The ID can be set to auto-populate or you can enter your own. Click the Post button once you’re done.
In this article, we will examine three different adjustment scenarios.
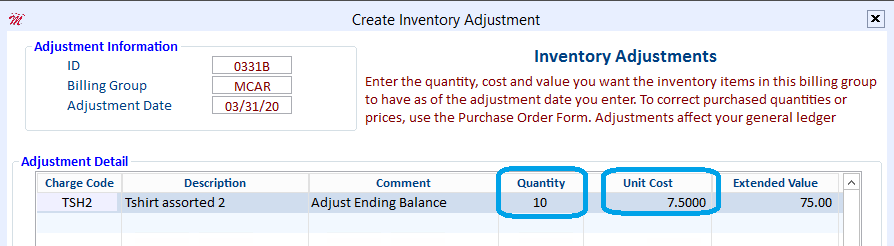
Scenario 1: The physical count is less than the quantity reflected in Cloud AMS (for example, you count 10 but Cloud AMS shows 15).
There are two ways you can handle this type of adjustment:
- The association absorbs the loss of the value for the missing merchandise (maintaining the unit cost and reducing the extended value).
- Add the cost of the missing merchandise into the remaining product (raising the unit cost and maintaining the extended value).
To absorb the loss (maintain the unit cost and reduce the extended value):
In the Quantity field, enter the number that you counted during your physical inventory. In the Unit Cost field, enter the average cost from the Inventory Valuation Report that you ran previously.
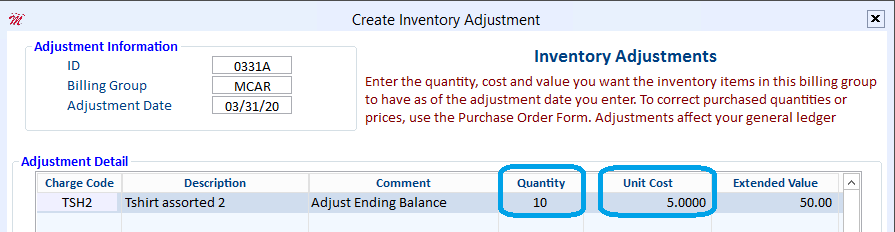
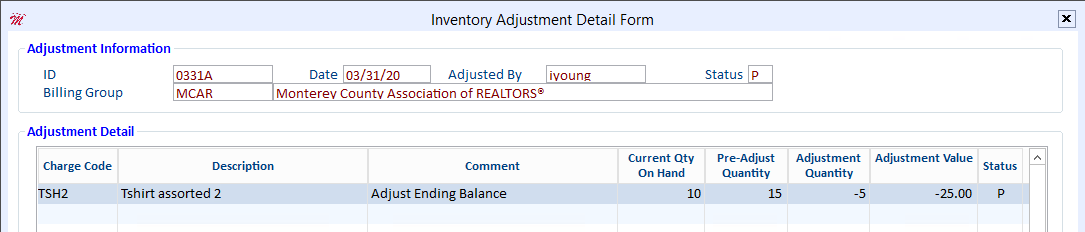
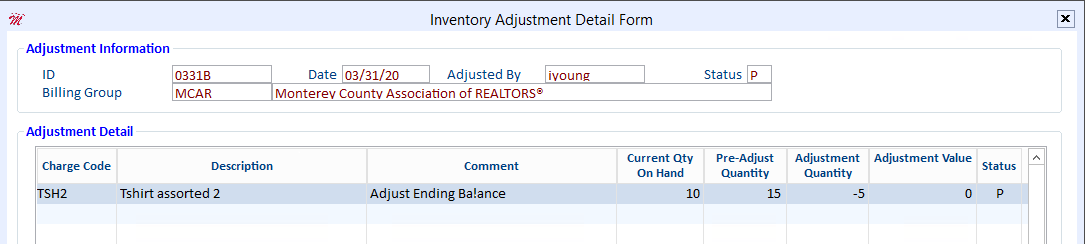
When complete, press Esc and then click the Post button. The system returns to the Inventory Adjustment Form. Zoom to view your posted adjustment. Notice that the quantity has decreased by two and an adjustment value of $-25.00 has been created.
To add the cost into the remaining product (raise the unit cost and maintain the extended value):
In the Quantity field, enter the number that you counted during your physical inventory. In the Extended Value field, enter the extended value from the Inventory Valuation Report that you ran previously.
When complete, press Esc and then click the Post button. The system returns to the Inventory Adjustment Form. Zoom to view your posted adjustment. Notice that the quantity has and the adjustment value is $0.00.
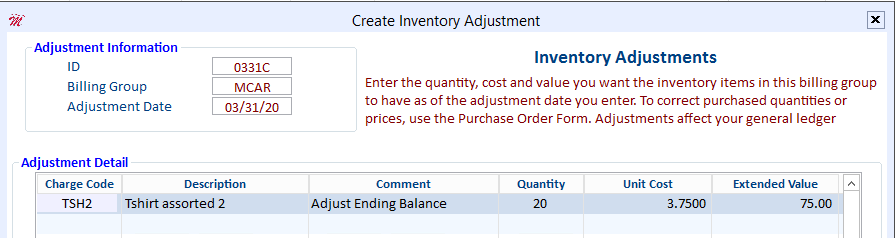
Scenario 2: The physical count is more than the quantity reflected in Cloud AMS (for example, you count 20 but Cloud AMS shows 15).
To add merchandise to the inventory at no cost (reduce the unit cost and maintain the extended value):
In the Quantity field, enter the number that you counted during your physical inventory. In the Extended Value field, enter the extended value from the Inventory Valuation Report that you ran previously.
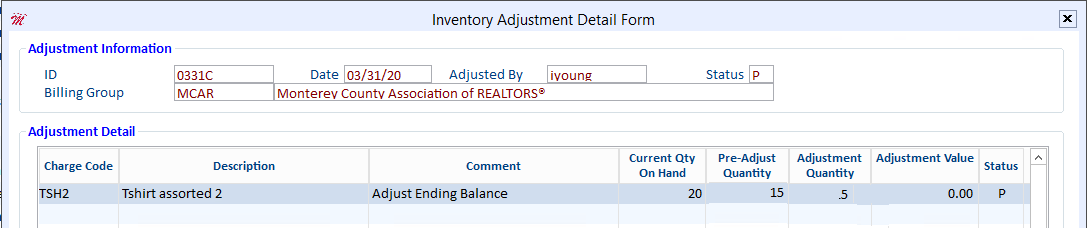
When complete, press Esc and then click the Post button. The system returns to the Inventory Adjustment Form. Zoom to view your posted adjustment. Notice that the quantity has and the adjustment value is $0.00.
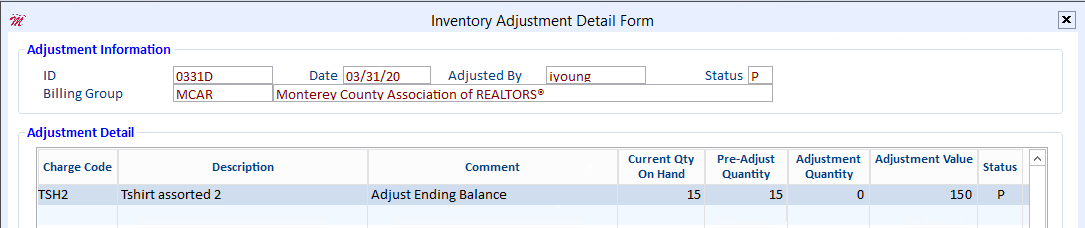
Scenario 3: The physical count matches the quantity reflected in Cloud AMS, but you need to correct the unit cost or extended value (for example, the system shows a unit cost of $5.00 and extended value of $75.00, but these values should be $10.00 and $150.00).
To modify the unit cost and extended value (maintaining the quantity):
In the Quantity field, enter the number that you counted during your physical inventory which also matches your report. Next, enter the desired unit cost or extended value for your adjustment. When you enter either of these values, the other value is automatically calculated.
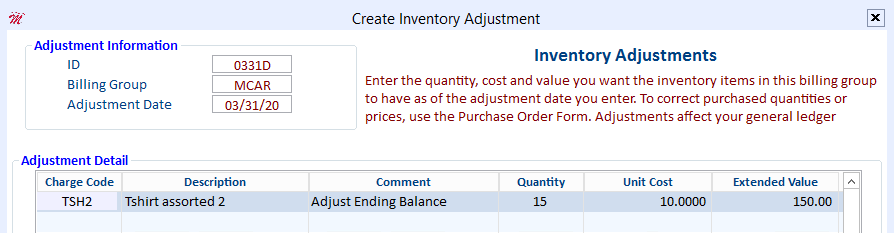
When complete, press Esc and then click the Post button. The system returns to the Inventory Adjustment Form. Zoom to view your posted adjustment. Notice that the adjustment value is $150.00.
Inventory Bar Code Labels
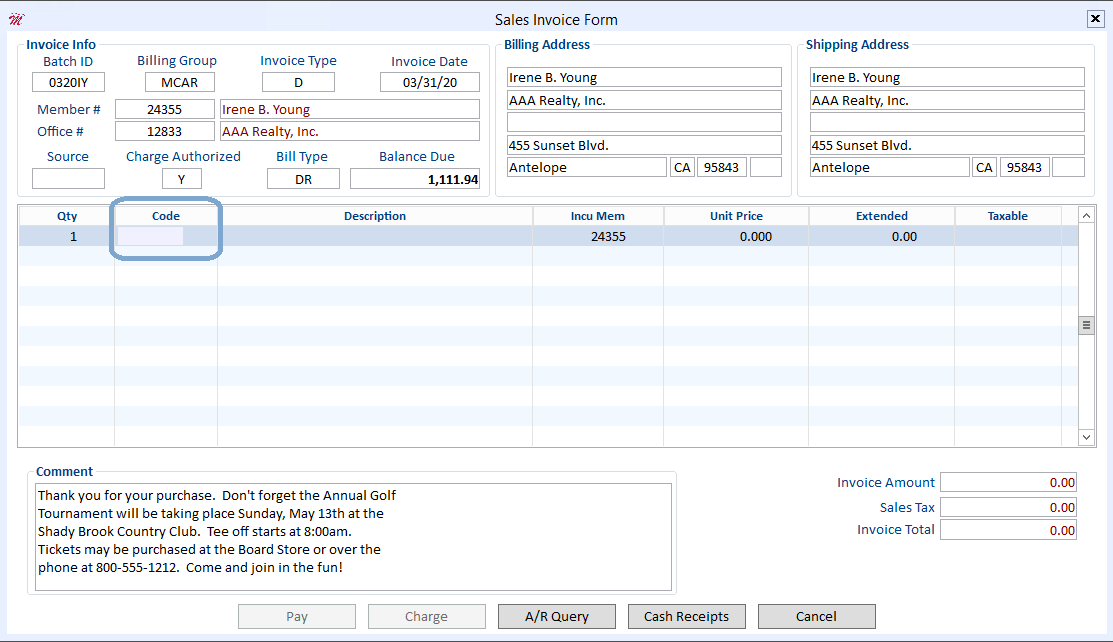
You can create inventory labels for the items you sell in your Realtor® store that can be quickly scanned by a bar code reader. With all the various signs and forms your store sells, it’s easy to manually select the wrong charge code. Using inventory labels in conjunction with a wand-style bar code reader will greatly reduce the incidence of errors.
Inventory labels work with the Rapattoni point-of-sale program, allowing your staff to easily and efficiently enter charge code data into the Code field on the Sales Invoice Form. Just place your cursor in the Code field and then scan the item’s bar code
Inventory labels are easily created using the Inventory Merge program in Cloud AMS and a Microsoft Word template supplied by Rapattoni.
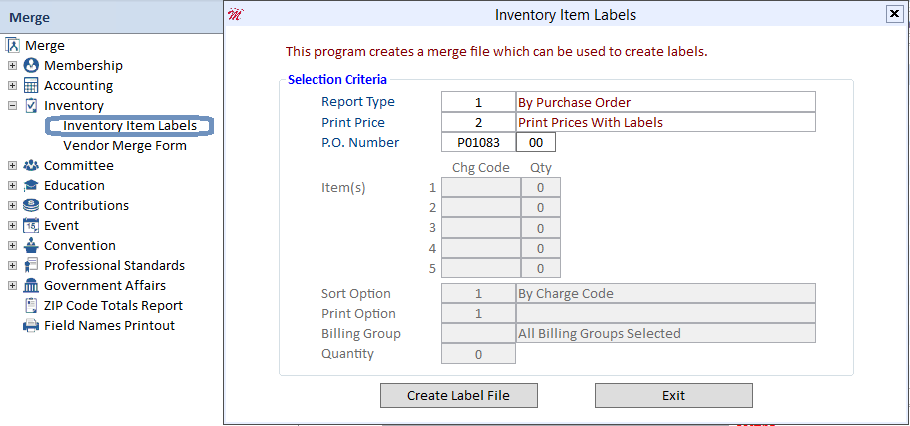
This merge can be run using Report Type 1 (By Purchase Order), which generates bar code labels based on the P.O. number entered. It can also be run with Report Type 2 (By Item), which allows you to enter specific inventory item charge codes to print. You may choose to include prices on the labels shown in the example above or select no prices.
The Inventory Items Labels Merge creates a _label.doc file which can then be merged into the Rapattoni-provided Microsoft Word label template called ^inv_lbl.doc.
Important Note:
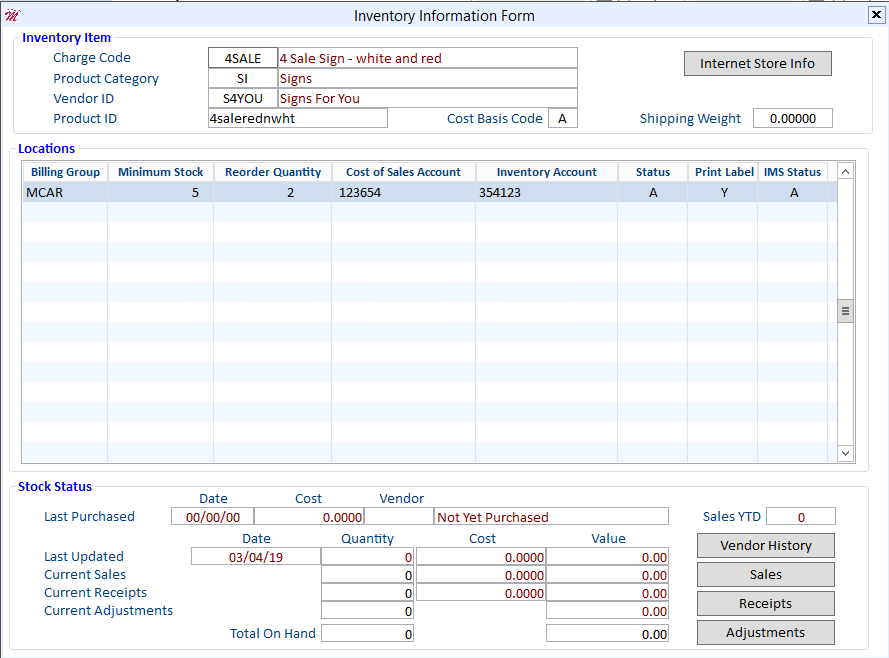
It is necessary to set the Print Label field to “Y” on the Inventory Information Form for the inventory items that you would like to print, as shown below.
Inventory Minimum Stock Requirements
| Title: | Inventory Minimum Stock Requirements |
| Submitted by: | Rapattoni Software Support |
| Issue: | What do I need to do when I get the "Time to Reorder! Quantity of # is Below Minimum Stock" message? |
Have you ever wondered why the pop-up message, "Time to Reorder! Quantity of # is Below Minimum Stock," occasionally appears when creating an invoice in the Sales Invoice Form? This warning is an indicator that the inventory item is below the minimum quantity you are required to keep on-hand, and that it is time reorder.
You can view or change the minimum stock required for an inventory item in the Inventory Information Form.
![]()
![]()
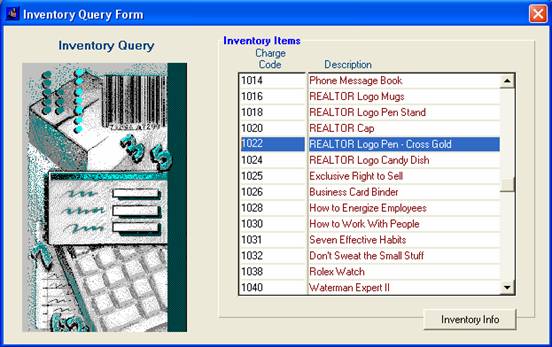
Select the appropriate charge code and (F5) zoom to the Inventory Information Form. You may alternately click on the Inventory Info button to zoom to the form.
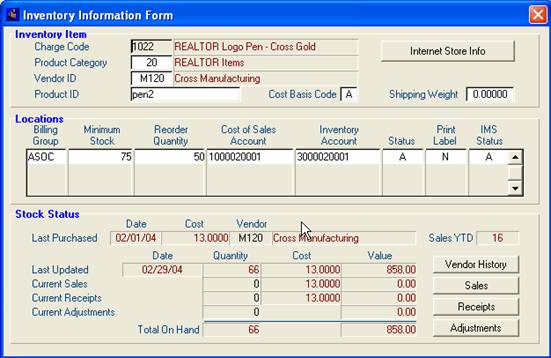
If the Minimum Stock amount is too low or high, you can change this number once you are in modify mode. If the amount is appropriate and you are receiving the Time to Reorder message, you will need to order and receive product through the Purchase Order Information Form. For additional assistance with the Purchase Order Information Form please call our Magic Support Help Line at (866) 730-7115.
The Inventory Information Form not only shows the Minimum Stock and Reorder Quantity, but it also gives you other valuable information about the item such as the Last Purchased Date and the Cost charged by the vendor. This Stock Status information can be quite useful when placing orders with your vendor, and the Vendor History button even shows you the contact phone number for your vendor. The complete Sales, Receipts and Adjustments for the item can be accessed from the respective buttons.
Please note that all fields in red are calculated by Magic and cannot be modified by the user.
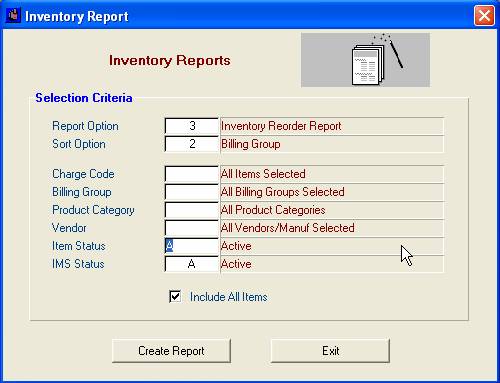
TIP: It’s a good idea to run a monthly Inventory Reorder Report (Report Option 3) to view items that are at or below their minimum stock amounts.
Inventory Setup/Reset
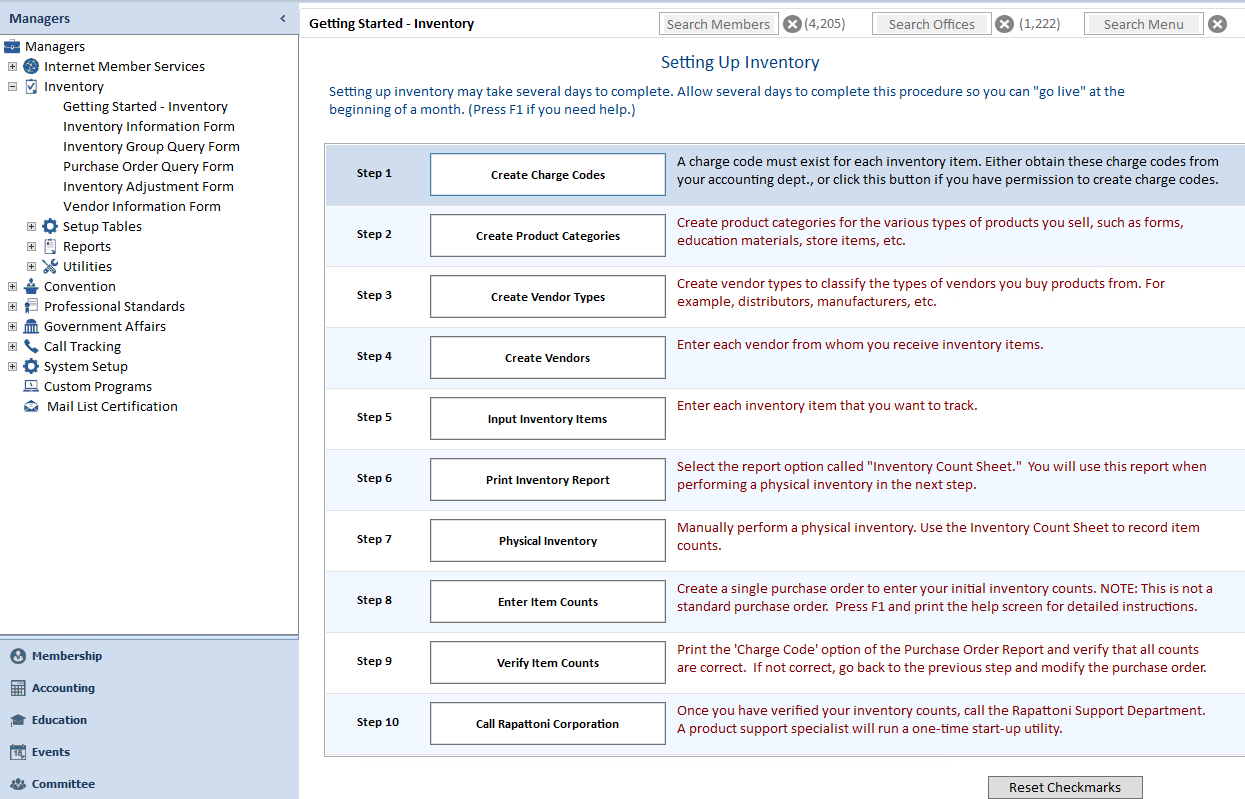
Setting up or resetting your inventory can seem like an overwhelming task at first, but with proper instruction, it can be accomplished with ease. To get your inventory up and running, your staff and the Cloud AMS Support Staff will need to work together. Whether you’re setting up your inventory for the first time or just need a complete reset of your current inventory, we’re here to help!
In addition, Cloud AMS includes a ‘Getting Started’ tutorial that walks you through the necessary steps. This valuable tool was designed to make the experience easier for the user.
Tip: Before you start to work through the “Getting Started” tutorial, please contact Cloud AMS support to schedule a time to discuss the tasks necessary to complete this process in more detail.
Inventory Setup Overview:
- Create charge codes for all inventory items.
- Create product categories for the various items in your inventory.
- Create vendor types to classify the types of vendors you buy products from.
- Enter each vendor you use to buy items.
- Enter each item that you wish to track in your inventory.
- Print an Inventory Report.
- Manually perform a physical inventory of all the items.
- Create a single purchase order to enter your initial inventory counts.
- Verify the item counts.
- Call the Cloud AMS Support Department to run necessary utilities to complete the process.
NOTE: We recommend that you set up/reset your inventory so that the new inventory goes "live" at the 1st of the month. Please contact Cloud AMS support in advance of this date to ensure all tasks are completed accurately and on time.