
Credit Card Payment Processing allows you to pay off outstanding invoices, for the selected invoice type, that match your selection criteria for members who have credit card information set up on their account. This program automatically creates receipts and applies them to the outstanding invoices, then prints a report that lists all the processed transactions and their statuses. If any credit card is rejected, the program creates a void. You can email the receipts for both successful transactions as well as declined transactions.
Here are the steps to follow:
Take note of the Batch ID number to use for the Auto Payment. You can have a separate batch so that when you have to email the receipts it will only email those you have processed the Auto Payment for.
Run Credit Card Payment Processing – Update Option 1 – “Process Payments – Trial”
- The menu auto-populates the Update Option field with “1 = Process Payments – Trial.” This will help you know who, what, and how much is going to be processed.
- Invoice Type can include multiple selections.
- Invoice Date is usually the date when you process your billing, unless you wanted to pay open invoices as of the current date.
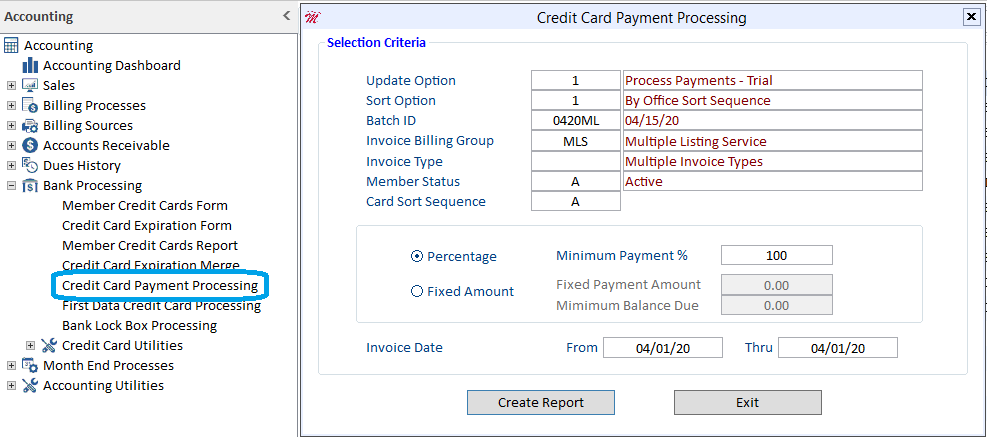
4. When the PDF report opens, take note of the Grand Total on the report (e.g., $12,425.00 is the total amount).
Run Credit Card Payment Processing – Update Option 2 – “Process Payments – Actual”
- The fields must have exactly the same values as you entered for the “Process Payments – Trial” process shown above.
- Let everyone know you’re about to run the process and hold off making changes to any records until the process is complete.
- Click the “Update” button and the system will then process the credit cards one at a time.
**Note: The system will only process the credit cards for any members with Open Invoices, bypassing other members who have credit cards on file unless they have an open invoice with the Invoice Type selected on the form.
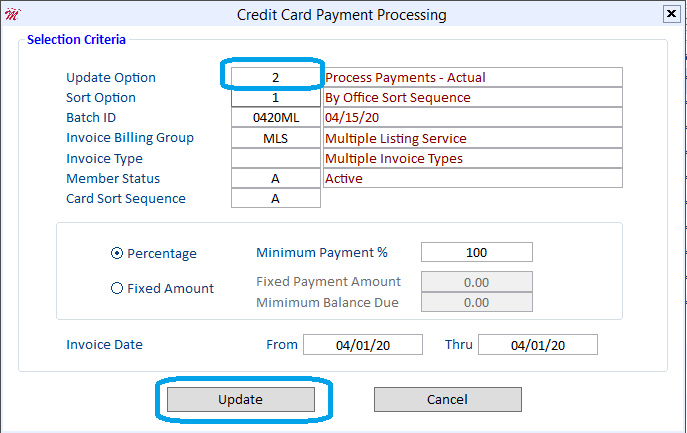
The report will come up when the process completes. Verify the total with the Trial Report (e.g., the total is $12,220.00). There’s a difference of $205.00, meaning there are some payments that did not process.
Run the Credit Card Log utility and view just the transactions with an “N” (No) in the Approved column.
Notice that the total of the first 3 transactions is the difference between the Trial and Actual reports.
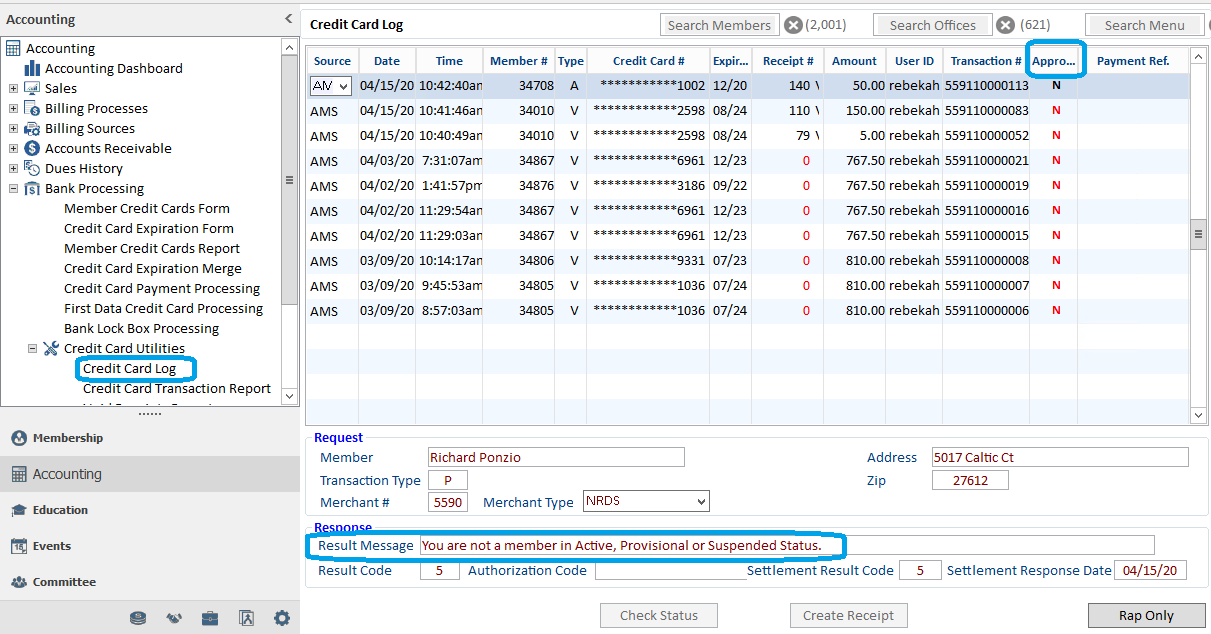
It’s sorted by the latest date and each transaction will have a Result Message explaining why the credit card did not process.
Result Code 5 shown above means the NRDS ID on the member record is inactive.
You can still process his payment by temporarily removing the NRDS ID. Leaving the NRDS ID blank will use the universal NRDS ID to process the payment. (Take note of the NRDS ID so you can enter it back after you run the payment again. Press “Ctrl+O” and then press “F3” to delete)
If the payment is successful, you will now have a paid receipt and a voided/decline receipt for the member. Take note of the member number so you can change the email address for the voided receipt. Since it has already been created, you do not need to send this to the member.
If the payment did not go through, make sure to only send one voided receipt email to the member.
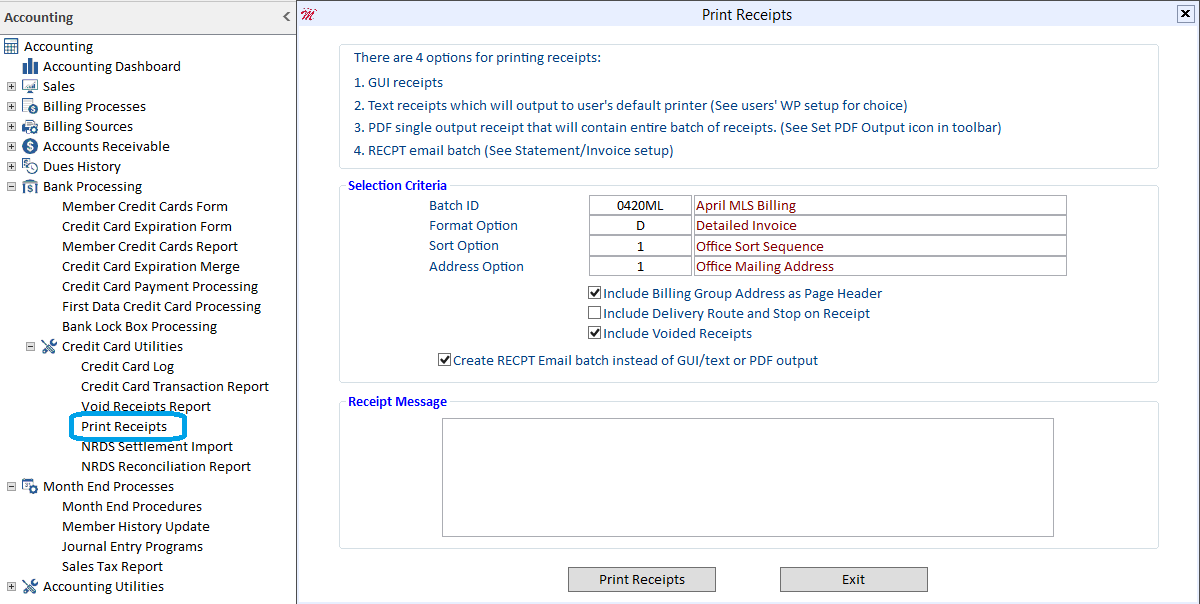
Run the Print Receipts Program
- From the Print Receipts utility, select the Batch ID and fill in the rest of the fields. Make sure to check the “Create RECPT Email batch instead of GUI/text or PDF output” option.
- Click the “Print Receipts” button.
Go to the Emails Statements/Invoices
You will have receipts to email with a Status showing “Not Sent.”
- Check the boxes for “Link to IMS” and “Link to PDF” for the applicable statement.
- Click the “View PDF” button to preview how the receipt looks (optional).
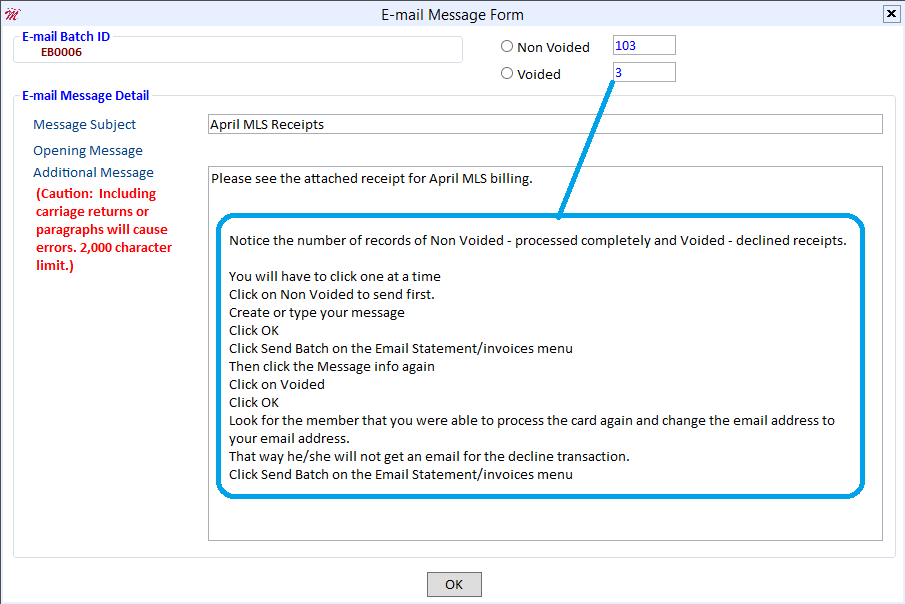
Click the “Message Info” button to enter a message that will be included in the email that the member receives.
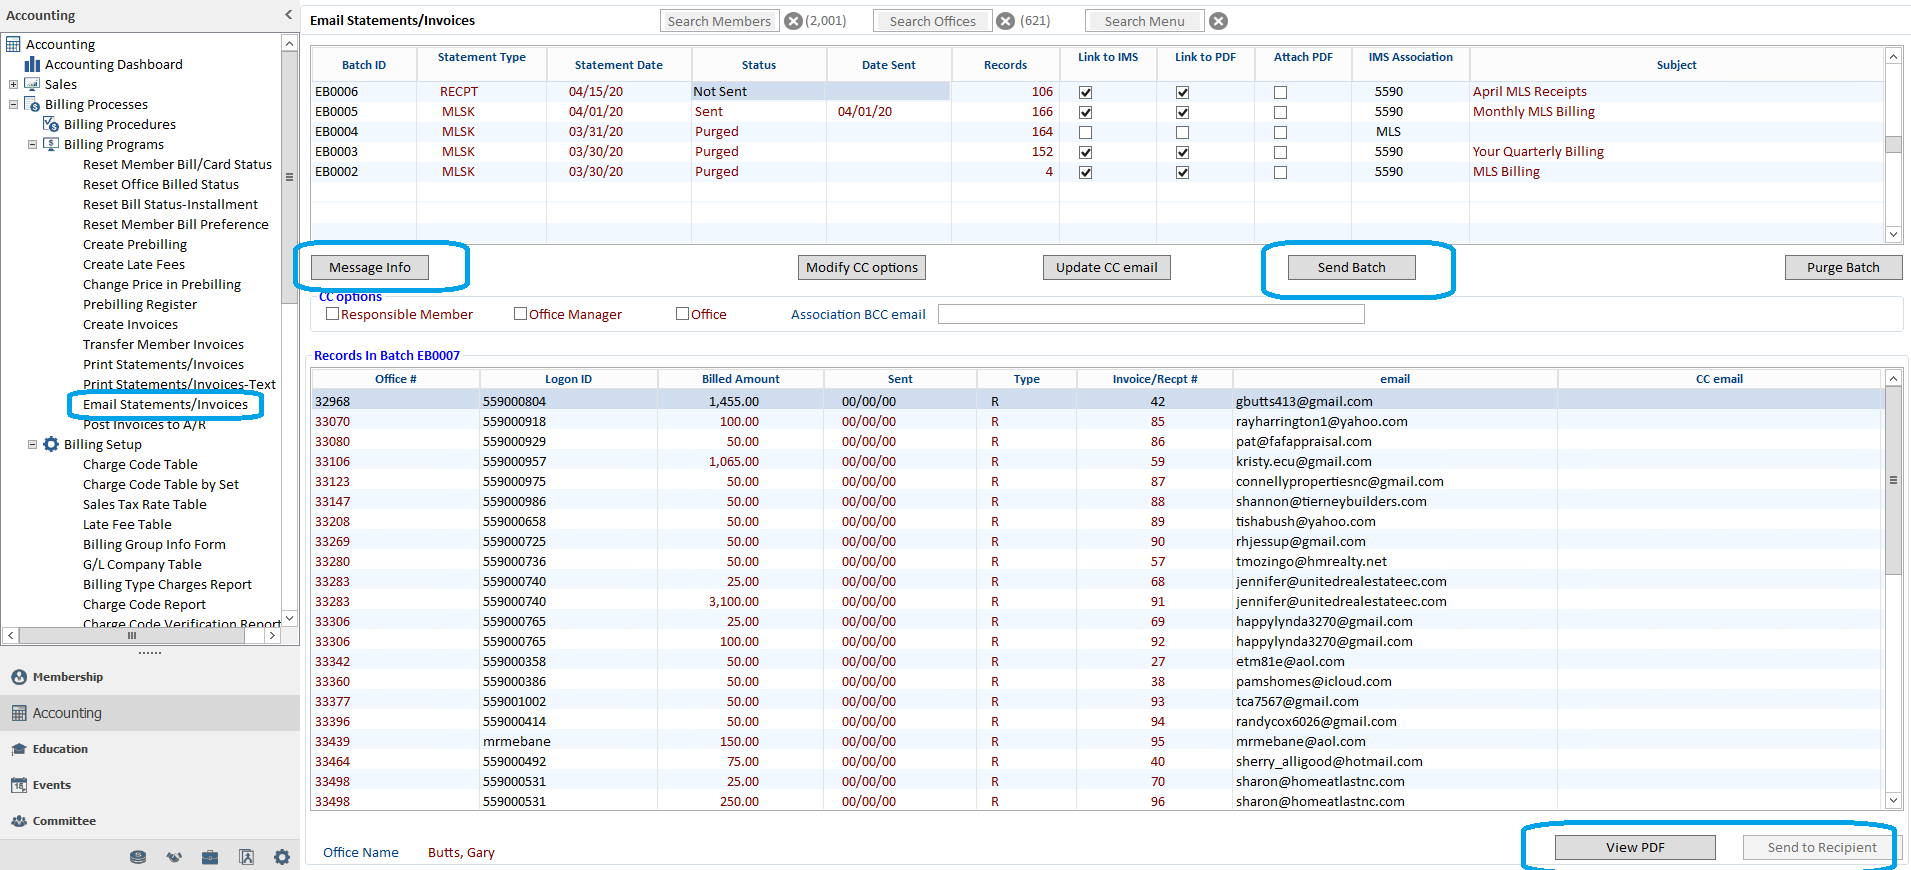
You will have two sets of emails to send; Non Voided (processed payments) and Voided (declined payments).
- Click on each one to type in your Message Subject and email message.
- Click the “Ok” button and then click the “Send Batch” button on the Email Statements/Invoices form to send the emails.
- Click the “Message Info” button again and click the next selection to verify your message.
- Click the “Ok” button again and then click the “Send Batch” button.
The Status column will now show as “Sent” with the current date.
The “Send to Recipient” button will allow you to view the actual email. Place your cursor on the very first record and press “Ctrl+M” to modify the email address to your email. A warning message will display. Click No – do not update the member’s email address since you just want to view the email that members are going to receive. Click the “Send to Recipient” button and check your email.
