Match Colors
Create an elegant flyer to complement your listing by matching colors on the flyer to the main listing image. This can be done by finding the RGB code for the color you want to match and entering it into the color picker tool when adding colors to a shape, border, or font.
If you don’t already have software that enables you to get RGB codes from your image (such as Photoshop) there are many free online sites that will help you to do this, such as: www.imagecolorpicker.com
Overlay Listing Images
Arrange listing images in different sizes and overlays to highlight listing features. Add borders to overlaid images to make them stand out.
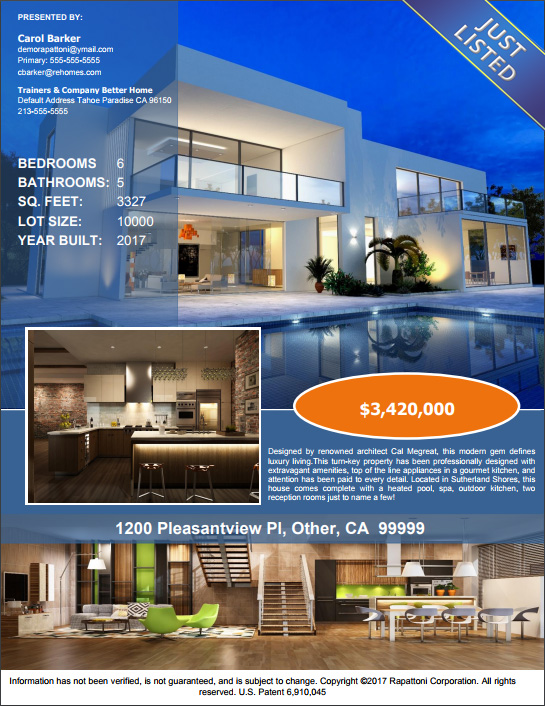
Remove Borders
Removing the page borders will enable you to place a listing image so it covers the page from edge to edge for a striking “brochure” look. It is always a good idea to physically print your report to see how it will look on paper. Some printers may not allow edge-to-edge printing and may place a small border around the page.
Add Clip Art
The Report Writer comes with a library of “royalty-free” clip art, in various colors, that you can use to enhance your reports. You can also upload up to 10 images of your own choosing. Make sure that the images you upload will not violate any copyrights. The Internet is a great resource for finding “royalty-free” clip art and photographs that can be used safely.
Use Shapes Creatively
Add visual interest by using shapes to add colored backgrounds to text and images. Shapes can be a solid color or can have a different colored outline.
Shapes are a great way to make text pop when overlaid on an image.
To do this, add a shape over the image, next use the color picker to add color to the shape. Then use the opacity slider to change the opacity of the color fill. This will allow the image below the shape to show through with enough shading to make any text placed on top of the shape easy to read.
Additional Examples