| Title: | Email Merge |
| Submitted by: | Rapattoni Software Support |
| Issue: | I know how to perform a merge and pull data from Magic, but how exactly does an e-mail merge work? |
The following steps are intended to help you perform an e-mail merge using a Rapattoni Magic data file. For detailed information on creating a merge data file, please refer to Chapter 6 Introduction to Magic Merge in the "Getting Started Manual" that is located in the Help menu under Documentation.
This procedure is designed to be a guideline only, since you may be using a different version of Microsoft Outlook or Microsoft Word than the versions demonstrated below.
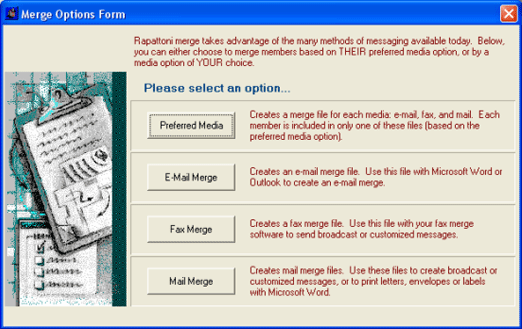
Perform a merge in Rapattoni Magic. Be sure to select E-Mail Merge in the Merge Options Form.
Open your Microsoft Outlook. You must have the full version of Microsoft Outlook, because this procedure will not work with Microsoft Outlook Express.
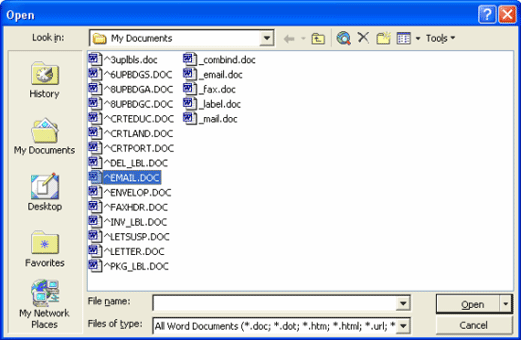
Next, open up Microsoft Word. Click on the File pull-down menu and select Open. You will need to locate the folder that contains your merge data. Since you are familiar with merging date from Magic, you will know where to locate this folder, but quite often it is in your c:\my documents\ folder.
Locate and open the file ^email.doc. This is an e-mail merge template. Open the template as a read-only file.
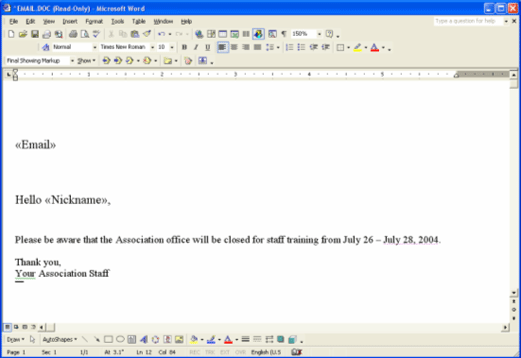
The e-mail template should look like our example below. We have added a customized message to our e-mail template example.
After you have added your customized message, you are ready to merge your data into the template. The easiest merge method is using the Merge toolbar. To open the Mail Merge toolbar, right-click anywhere in the empty space to the right of your current active toolbars and left-click on Mail Merge.
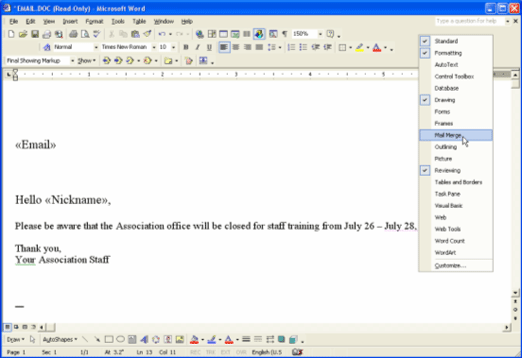
The following toolbar will become visible. Versions of Microsoft Word vary, but all versions have a Mail Merge toolbar.
![]()
Click the Open Data Source button which we have circled in red. The Select Data Source window will open, and you will need to locate your _email.doc merge data file. Double-click on the _email.doc file and you will see a slight flashing, then the Select Data Source window will close.
To merge the data that you have just selected, click the Merge to E-mail button which we have circled in green. Make sure your Microsoft Outlook is open before clicking this button. A Merge to E-mail window will open allowing you to enter a subject line for your e-mails.
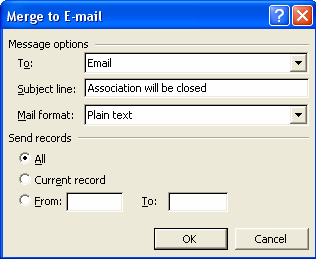
Click OK and the software will now merge your e-mail template with the data file. Newer versions of Microsoft Outlook will display the following security message that will require you to click the "Allow access for" check box and select the time increment of 10 minutes.
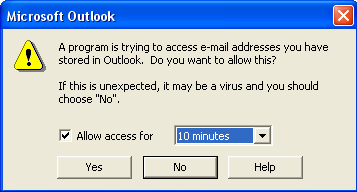
After you click Yes the software will automatically send the resulting e-mail messages to your Outbox in Microsoft Outlook. This process is usually very quick. When Microsoft Word finishes the merge, look in your Microsoft Outlook Sent Items folder to verify that the e-mail messages have been sent. Once the messages have been added to your Sent Items folder, the merge is complete.
TIP: In the Rapattoni Magic 8 Multimedia CD-ROM Tutorial, lessons 10 and 11 under
"Rapattoni Magic Basics" walk you through the e-mail merge procedure step-by-step.

